How to Start a Sourdough Starter at Home: Step-by-Step Guide for Beginners
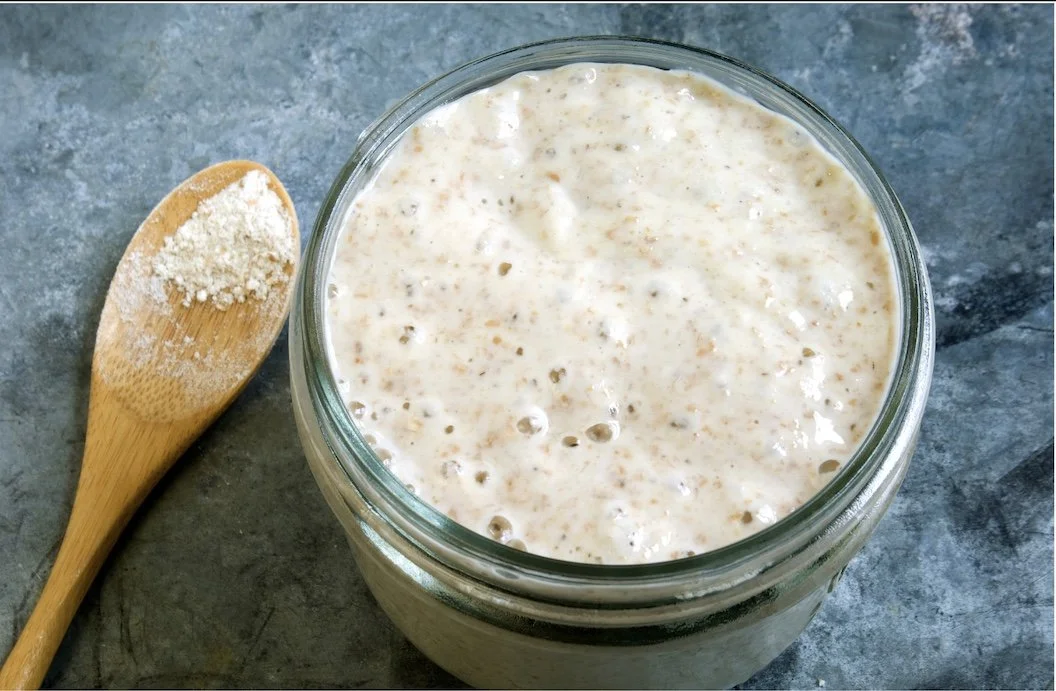
Jar of sourdough starter
If you’ve ever wanted to learn how to make sourdough bread from scratch, the very first step is creating your own sourdough starter.
And while sourdough can seem a little intimidating at first, I promise it’s much simpler than it looks.
A sourdough starter is simply flour and water mixed together and left to ferment over time. Over the next few days, wild yeast and good bacteria begin developing naturally, creating the bubbly starter that helps sourdough bread rise without needing commercial yeast.
It’s part baking, part science experiment and honestly… incredibly rewarding once you start seeing those first bubbles appear.
In this beginner-friendly sourdough guide, I’ll walk you through exactly how to start a sourdough starter at home, what to expect each day and the little tips that helped me along the way.
What You’ll Need:
One of the things I love most about sourdough is that you don’t need lots of fancy equipment to get started.
Here’s what you’ll need:
Clean sterilised jar (500ml–1L capacity)
Wide-mouth jars work best
Digital kitchen scales
50g baker’s flour (Tipo “00”, bread flour or plain flour all work)
50g filtered water or cooled boiled water
Spoon or spatula
2 rubber bands
Muslin, cheesecloth or breathable fabric
Why use a clear jar?
A clear jar makes it much easier to track bubbles and monitor how much your starter rises and falls each day. Trust me, once it becomes active, checking the bubbles becomes strangely exciting 😂
Day 1 - Starting Your Sourdough Starter
Step 1: Combine the flour and water
In your clean jar, combine:
50g flour
50g water
Stir until smooth and no dry flour remains.
Step 2: Cover your starter
Scrape down the sides of the jar and cover loosely with muslin, cheesecloth or breathable fabric secured with a rubber band.
This allows airflow while still helping protect the starter from dust and unwanted bacteria.
Step 3: Mark the starter level
Place a second rubber band around the jar at the height of your starter mixture.
This becomes your “starting line” and helps you track how much your starter rises over the coming days.
Step 4: Leave it to rest
Leave the jar on the bench at room temperature, ideally somewhere warm (around 22–26°C).
Day 2: The Waiting Game
Step 1: Check your starter
Today is all about observation.
You may notice:
a few small bubbles
a slight smell developing
or absolutely nothing yet
All of that is completely normal.
Step 2: Be patient
One of the biggest surprises for me was realising how much patience sourdough requires in the beginning.
Some starters become active quickly while others take a little longer depending on:
temperature
flour type
and even the season
At this stage, don’t feed your starter yet. Simply leave it on the bench and let the natural fermentation process begin.
Days 3–5: The Exciting Stage
This is usually when things start getting interesting and you’ll hopefully begin seeing signs of life in your starter.
Step 1: Feed your starter
Scoop 50g of your starter into a clean bowl. Add 50g flour and 50g water, then stir until smooth and well combined, with no dry flour remaining.
Pour the mixture back into your clean sterilised jar.
This creates a 1:1:1 feeding ratio:
1 part starter
1 part flour
1 part water
The remaining starter can be discarded at this stage.
Step 2: Watch for activity
By Day 3 or 4, you may begin noticing:
bubbles throughout the jar
slight rising after feeding
a tangy or sour smell developing
This is a great sign that wild yeast and beneficial bacteria are beginning to establish themselves.
Step 3: Keep your starter warm
If your starter seems inactive, don’t panic.
Cooler kitchens can slow fermentation significantly and some starters simply take longer to become active.
During winter, I noticed my starter became much happier once I:
used slightly warm water
wrapped the jar in a tea towel
kept it on a wooden board instead of a cold stone bench
A little warmth can make a huge difference.
Day 6 Onwards: Building Strength
Once your starter is consistently rising and falling after feeds (usually around Day 5 or 6), it’s time to increase to twice-daily feeds.
Step 1: Feed every 12 hours
Feed your starter approximately every 12 hours to help build strength and activity.
Step 2: Feed your starter
Scoop 50g of your starter into a clean bowl.
Add:
50g flour
50g water
Stir until smooth and well combined.
Pour the mixture back into your clean sterilised jar.
Step 3: Watch for growth
At this stage, your starter should become noticeably more active and begin doubling - or even tripling - in size between feeds.
It should also smell pleasantly tangy and yeasty rather than sharp or unpleasant.
The Float Test: Is Your Starter Ready?
One of the most exciting milestones in sourdough baking is the float test.
Once your starter reliably doubles within 4-6 hours after feeding, gently drop a spoonful into a glass of water.
If it floats, your starter is usually strong enough to bake bread with.
If it sinks, don’t stress. Simply continue feeding consistently for another day or two and try again.
Most starters are ready somewhere between Day 7-10, although cooler temperatures can slow things down. Some starters can take up to 14 days before they’re strong enough to bake a loaf with, so don’t panic if yours takes a little longer.
When Can You Use Sourdough Discard?
This was one of my favourite discoveries because I hated throwing discard away in the beginning.
Once your starter becomes bubbly and develops that light tangy smell (usually after Day 4 or 5), you can start using the discard in recipes that don’t rely on it for rise.
Sourdough discard adds:
flavour
a subtle tang
softness to baked goods
and many people find fermented foods easier to digest
Some of my favourite sourdough discard recipes so far include:
🥞 Pancakes
🍪 Chocolate chip cookies
🍫 Brownies
🍕 Pizza dough
🧇 Waffles
🧁 Muffins
⚠️ For actual sourdough bread loaves, wait until your starter passes the float test and is fully active.
Beginner Sourdough Tips That Helped Me
Use a clear jar
Using a clear jar makes it much easier to monitor your starter’s progress each day. You’ll be able to see bubbles forming, track how much it rises and notice when it begins falling after feeding.
Honestly, watching those bubbles appear becomes surprisingly exciting.
Keep your starter warm
Sourdough loves warmth. If your kitchen is cool:
wrap the jar in a tea towel
place it on a wooden surface
or leave it in the oven with the light on (oven switched off)
Feed consistently
Your starter thrives on routine. Try feeding around the same times each day where possible.
Smell matters
A healthy starter should smell:
tangy
yeasty
slightly fruity or sour
It should never smell rotten, mouldy or overly unpleasant.
Don’t stress about perfection
Some days your starter will look super bubbly.
Other days it may seem quiet. That’s normal.
Sourdough has a rhythm and every kitchen environment is slightly different.
Try adding a little wholemeal or rye flour
One thing I learnt along the way is that wholemeal and rye flour can sometimes help give your starter a little boost, especially in the beginning.
They contain more natural nutrients and wild yeast which can help encourage activity and bubbling.
Even swapping out a small amount of your regular baker’s flour can make a difference.
Name your starter
It might sound silly, but naming your starter somehow makes the whole process feel more fun and less intimidating.
Once you start feeding it every day, it quickly begins to feel like part of the family 😂
My Biggest Piece of Advice
If I could give one piece of advice to beginner sourdough bakers, it would be this:
Don’t overcomplicate it.
There’s so much information online that it can quickly feel overwhelming, but at the end of the day, sourdough is simply flour, water, time and consistency.
You don’t need perfect technique to begin.
You just need to start.
Once you feel more confident, don’t be afraid to change things up and experiment a little. Every sourdough baker develops their own rhythm and learns what works best in their kitchen over time.
Honestly, watching that first bubbly, active starter come to life on your kitchen bench feels incredibly rewarding.
More Sourdough Posts You Might Enjoy
What I Wish I Knew Before Starting My Sourdough Journey
Sourdough Discard Chocolate Brownies
Sourdough Pancakes
My First Sourdough Loaf (coming soon!)