
Halloween Jack-O-Lantern Pizzas
Halloween dinner should be fun, not fussy and these Halloween Jack-O-Lantern Pizzas bring all the spooky fun without the stress. I love how something as simple as a few tortillas, some cheese and a little creativity can turn an ordinary dinner into a Halloween highlight.
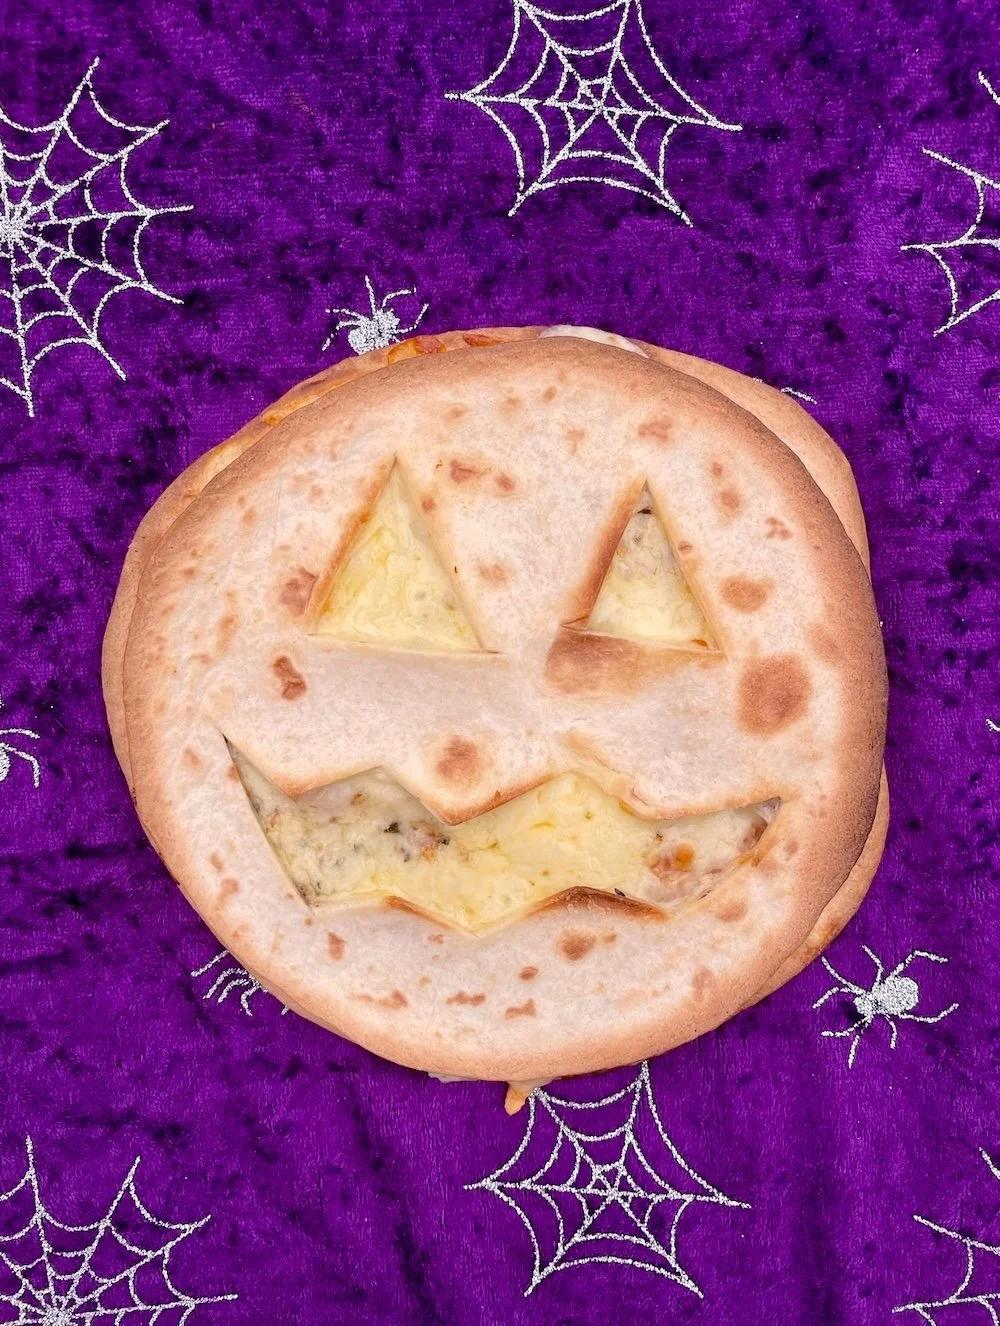
All it takes is five ingredients and a few minutes: spread your sauce, sprinkle on some cheese, and then the best part - carve cheeky little pumpkin faces out of a second tortilla to pop on top. Into the oven they go and just a few minutes later you’ve got crisp, cheesy mini pizzas with the cutest jack-o-lantern grin.
These are a hit with kids (and secretly the grown-ups too). They’re perfect for a themed Halloween dinner, a quick party platter, or a fun lunchbox surprise. No big carving mess… just big smiles all around. 🎃✨

Halloween Jack-O-Lantern Pizza
Make Halloween dinner extra fun with these mini Jack-O-Lantern Pizzas! Ready in 5 minutes with just 5 ingredients! Perfect for parties, lunchboxes, or themed family meals. Kid-friendly and easy to customise.
Ingredients
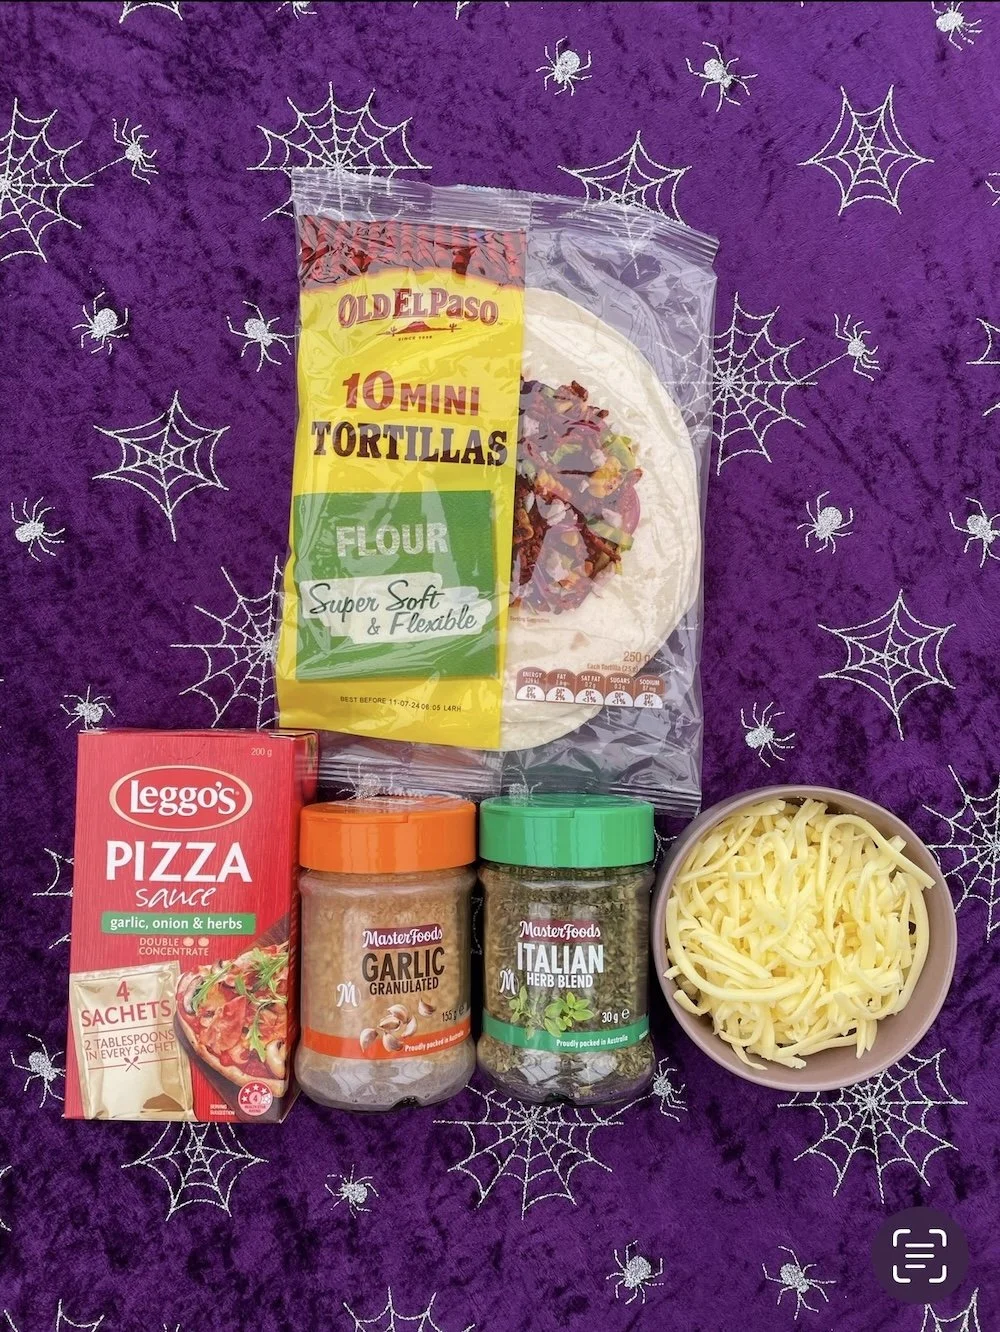
- 1 pack mini tortillas (2 mini tortillas per person)
- Tomato paste or pizza sauce
- Italian herbs (or mixed dried oregano & basil)
- Garlic granules
- Grated cheese (mozzarella or pizza blend)
- Optional: sliced ham or salami, thinly sliced capsicum, mushrooms or pineapple
Instructions
- Preheat oven to 200°C (conventional). Line a baking tray with baking paper.
- Place a mini tortilla on a chopping board. Spread a thin, even layer (about 1–2 tbsp) of tomato paste or pizza sauce across the tortilla, leaving a small edge. Lightly sprinkle over Italian herbs and add a light dusting of garlic granules. Top with grated cheese. Add optional toppings (ham/salami) if using.
- Take another tortilla and use a small sharp paring knife to cut out jack-o-lantern eyes and a mouth (think triangle eyes and a zigzag smile or teeth). Gently push out the cut shapes so you have the full tortilla with holes for the face.
- Carefully lay the cut-out tortilla (pumpkin face) on top of the prepared base. If you used toppings, try to keep them slightly under the face so features remain visible.
- Transfer pizzas to the prepared tray and bake for 4–6 minutes, or until cheese is melted and the edges are turning golden and crisp. (Ovens vary — watch closely after 4 minutes.)
- Serve immediately while hot. For lunchboxes, allow to cool and add to lunchboxes.
- Best served fresh. If making ahead, assemble and refrigerate, then bake just before serving. Leftovers keep 1–2 days in the fridge; reheat in an oven or air-fryer for best texture.
Notes
Top Tips:
- Base options: Mini tortillas give a thin, crisp crust, while small pita rounds make a thicker, chewier pizza.
- Topping ideas: Mix it up with ham, salami, pepperoni, capsicum, or mushrooms - anything your family loves.
- Pumpkin faces: Get creative with different expressions - happy, surprised, spooky teeth or silly smiles!
- Extra crispiness: Bake on a preheated tray or pizza stone for a perfectly golden base.
- Air fryer option: Cook at 180°C for 2-4 minutes, keeping a close eye so they don’t burn.
- Gluten-free: Simply swap in GF tortillas for a worry-free option.
- Time-saver: Assemble multiple pizzas on a tray and bake in batches.
- Serving & storage: Best served fresh, but you can assemble ahead and refrigerate, then bake just before serving. Leftovers keep 1–2 days in the fridge - reheat in the oven or air-fryer for the best texture.
Nutrition Facts
Calories
230Fat
13 gSat. Fat
7 gCarbs
19 gFiber
2 gNet carbs
17 gSugar
1 gProtein
10 gSodium
439 mgCholesterol
31 mgThe nutritional information provided is computer generated and is only an estimate. This data is provided as a courtesy for informational purposes only.


