
Choc Mint Ice Cream Cake
If you’re looking for an easy no-bake dessert that everyone will love, this Choc Mint Ice Cream Cake is a showstopper! Made with creamy choc mint ice cream, a crunchy Oreo base and drizzled with Ice Magic, this cake is the perfect cool treat for summer birthdays, parties or any choc-mint lover. Simple to make and delicious to eat. this no-bake ice cream cake will be your new go-to celebration dessert!


Choc Mint Ice Cream Cake
This easy Peppermint Choc Chip Ice-Cream Cake is the ultimate dessert for mint lovers and would look just perfect for your next celebration or even as a Christmas Dessert.
Ingredients
- 1-2 packets Oreo cookies (depending on thickness of crust)
- 1 tub Bulla Creamy Classic Choc Mint Chip Ice Cream
- 1 bottle Cottee’s Ice Magic (chocolate flavour)
- Assorted mint chocolate bars or biscuits (e.g. Mint Slice, Aero Mint, Peppermint Crisp)
Instructions
- Remove the ice cream from the freezer and set aside to soften slightly.
- Lightly spray a 20cm springform pan with cooking spray and line the base and sides with baking paper.
- Blitz the Oreo cookies in a food processor until fine. Pour into the prepared tin and press firmly with the back of a spoon to form the base.
- Place the base in the freezer for 10 minutes or so, while the ice cream softens to a spreadable consistency.
- Spoon the softened ice cream over the base, smoothing the top. Freeze until firm - preferably overnight.
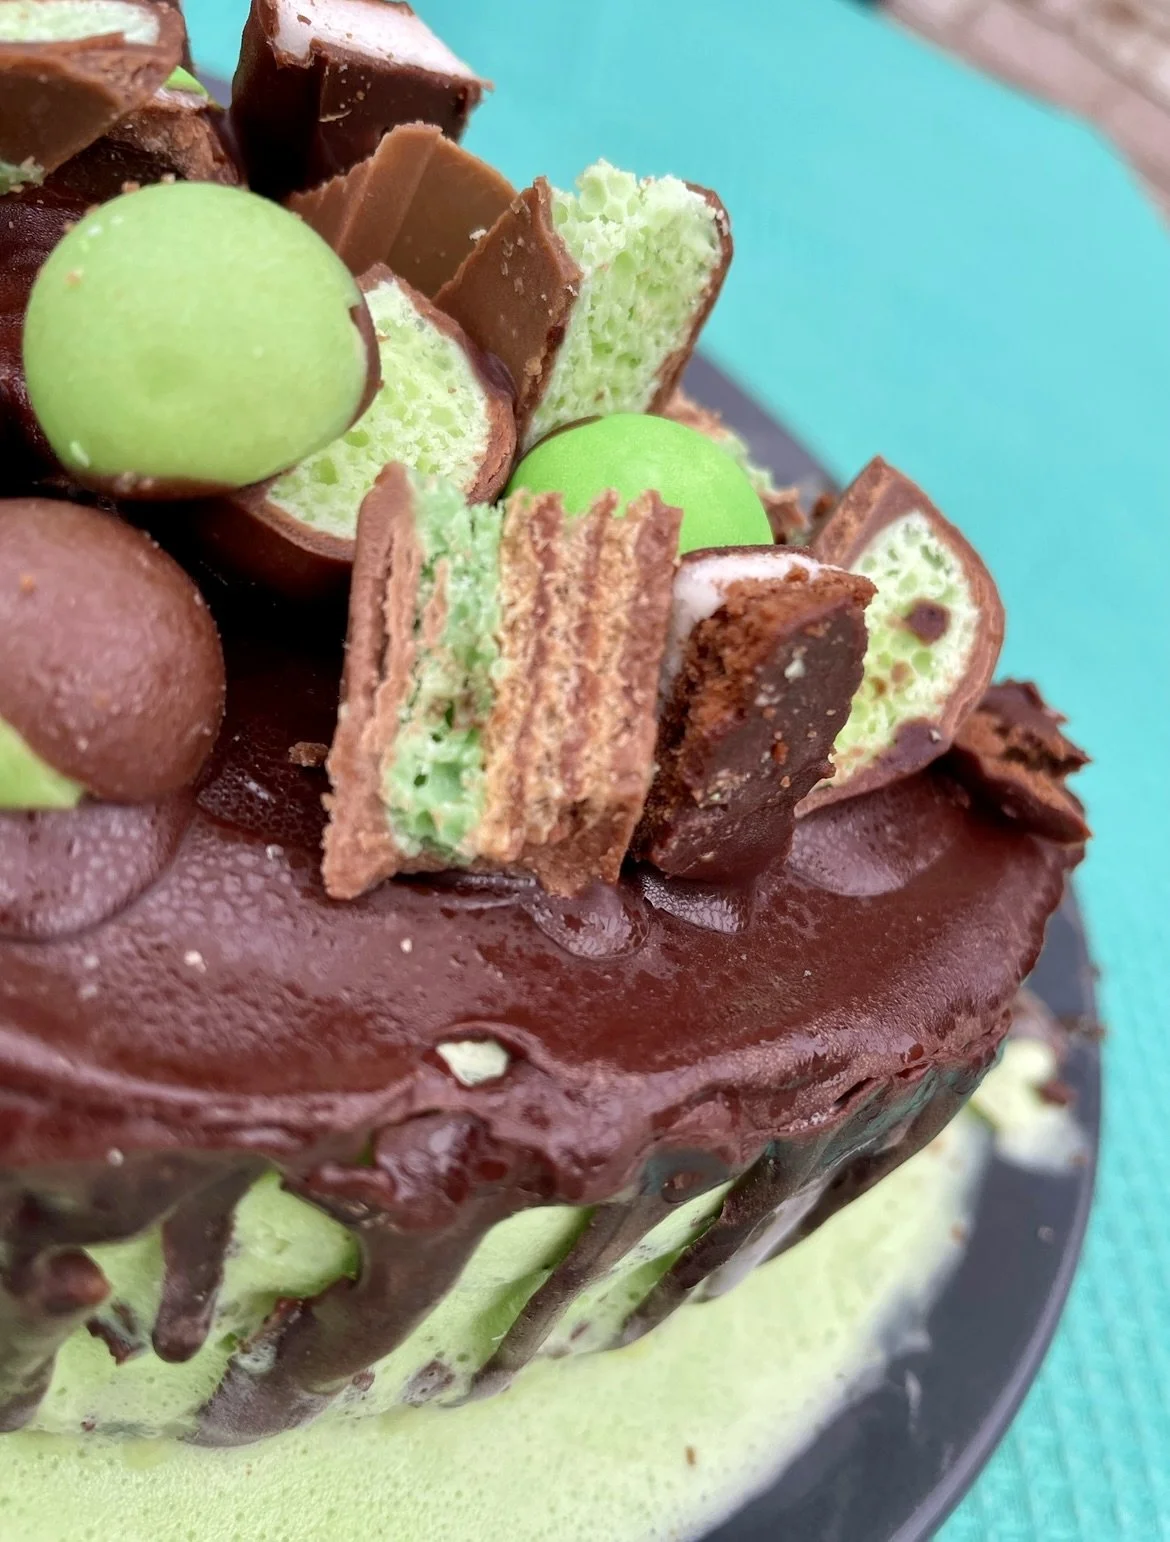
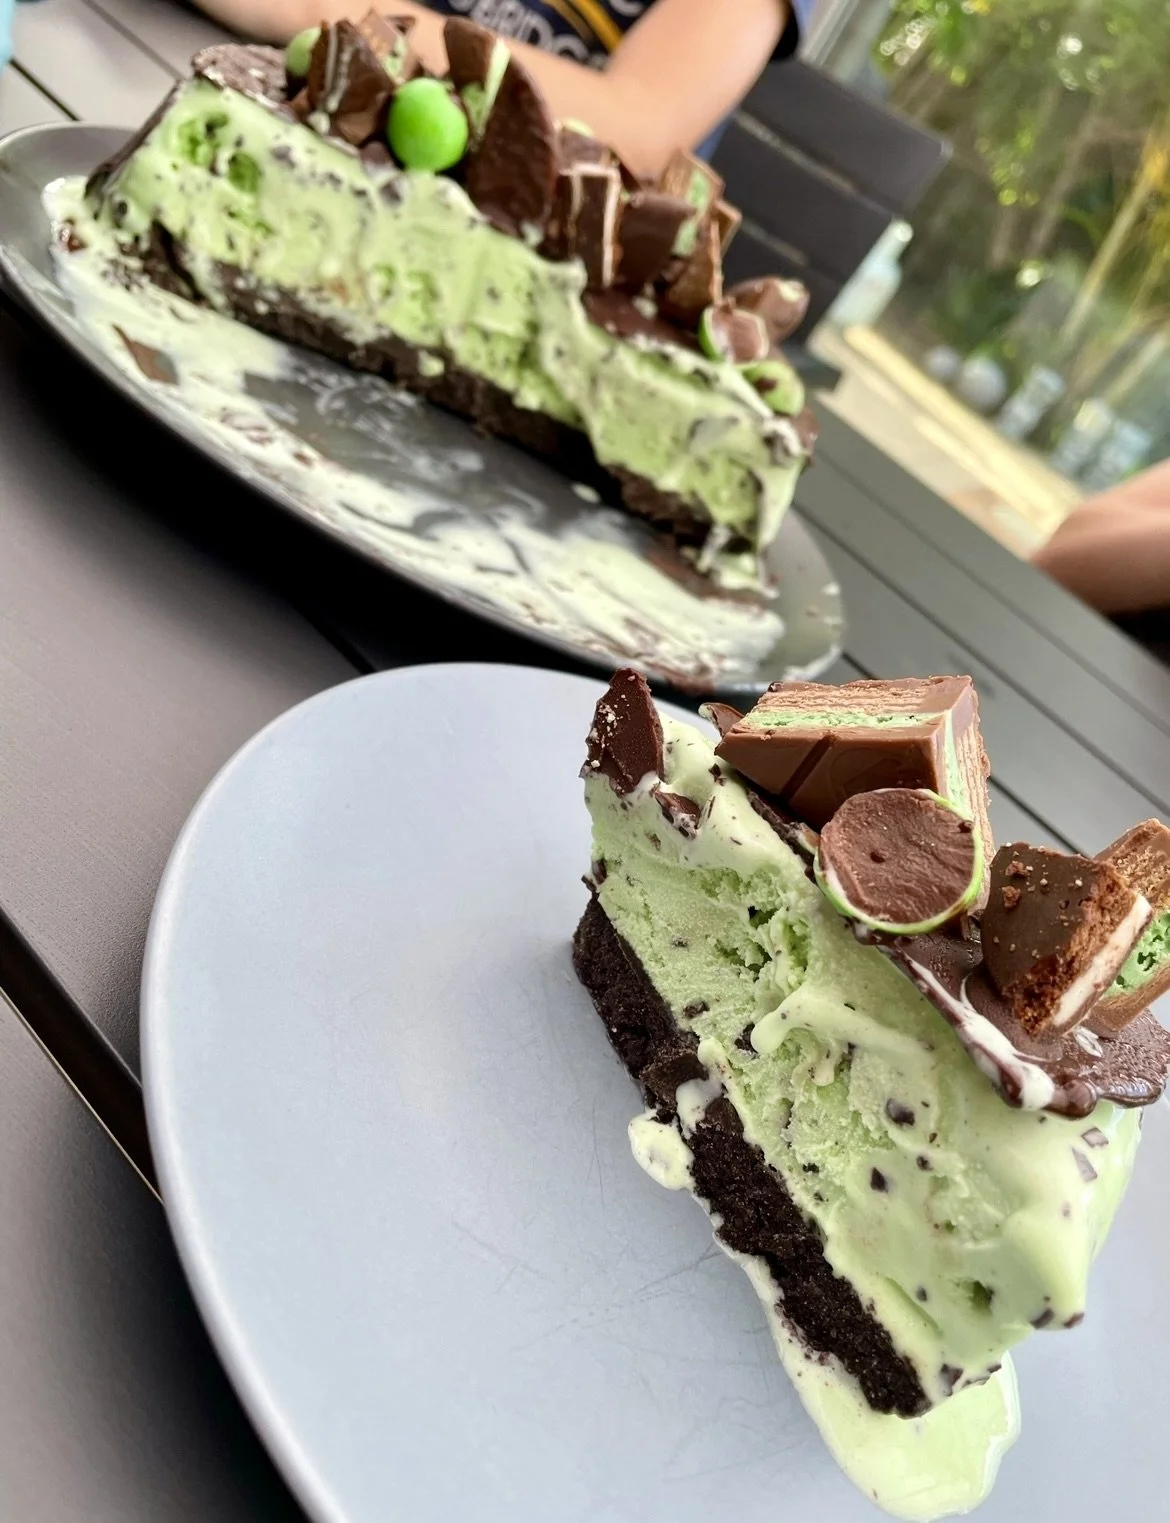
- On the day of serving, chop your mint chocolates into decorative pieces.
- Remove the cake from the tin and place on a serving plate.
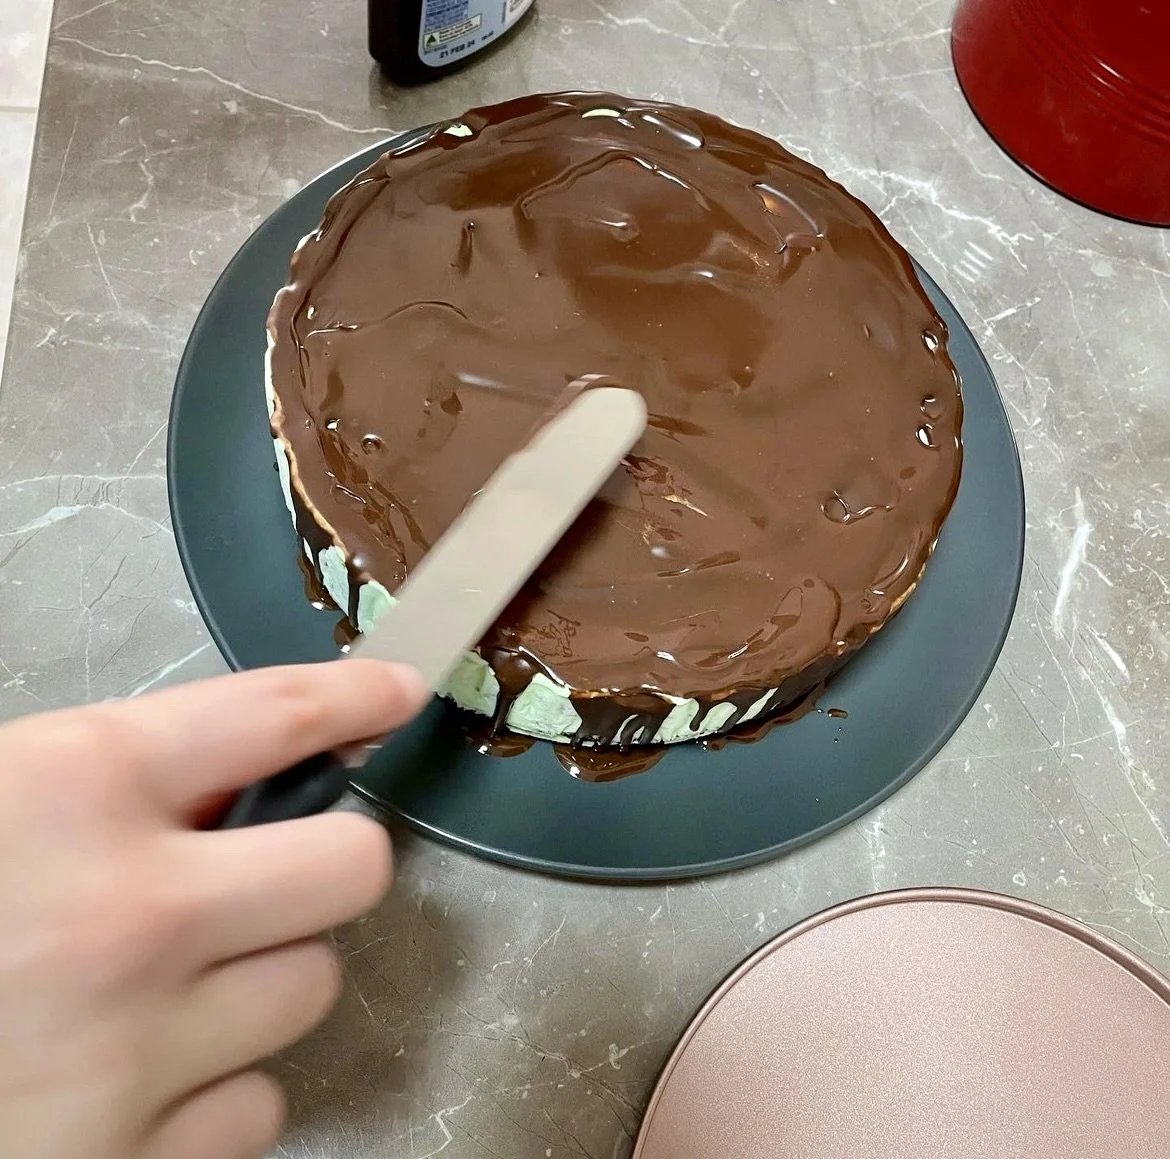
- Drizzle Ice Magic around the edges to create a drip effect. Freeze for 5-10 minutes until set.
- Pour more Ice Magic over the top and smooth with a palette knife. Freeze again for 5-10 minutes.
- Using Ice Magic as “glue,” decorate the top with your chopped mint chocolates.
- Return to the freezer until ready to serve. Slice and enjoy!
Notes
Top Tips:
- Soft scoop: Let the ice cream soften just enough to spread. Too melted and it won’t hold its layers.
- Party-ready: Assemble the cake the day before, then decorate on the day for an easy make-ahead dessert.
- Minty magic: Get creative with toppings - think Peppermint Crisp, Mint Slice, Aero Mint or any other choc mint bars you can find for extra crunch and colour.
- Serving tip: Slice straight from the freezer with a hot knife for clean, even pieces.
- Summer-ready: Keep the cake in the freezer until serving to beat the summer heat.
- Christmas twist: Add crushed candy canes or red-and-green chocolates for a festive look.
- Make it vegan: Use a dairy-free mint ice cream and dairy-free chocolate toppings.
Nutrition Facts
Calories
2Fat
0 gSat. Fat
0 gCarbs
0 gFiber
0 gNet carbs
0 gSugar
0 gProtein
0 gSodium
1 mgCholesterol
0 mgThe nutritional information provided is computer generated and is only an estimate. This data is provided as a courtesy for informational purposes only.


