
Easy Homemade Sushi Rolls
Sushi always felt like one of those “too hard” recipes to make at home… something you’d only order from your local sushi bar or grab as a treat.
But one day, I decided to give it a go and I was pleasantly surprised just how easy it really is. If you can boil rice and cook chicken, you can make sushi!
These easy homemade sushi rolls quickly became a family favourite.
Just like my pizza scrolls, this recipe is designed for busy families who want something fun, affordable and delicious. You don’t need a sushi mat, fancy ingredients or chef skills, just simple pantry staples and a few fresh fillings.
They’re perfect for lunchboxes, after-school snacks, parties or even a fun weekend activity with the kids. Once you try making your own sushi at home, you’ll be surprised how easy (and a little addictive!) it is.
Now it’s one of those recipes my girls love making, especially during uni holidays. It’s messy, fun and everyone gets to build their own rolls just the way they like them, which honestly makes weekend lunches or dinners so much easier.
Why You’ll Love This Recipe
Budget-friendly compared to takeaway sushi
No sushi mat required
Perfect for lunchboxes and snacks
Kid-friendly and fun to make together
Easy to customise with your favourite fillings
FAQ
Can I make sushi without a mat?
Yes! A chopping board works perfectly - just roll tightly using your hands.
Can I make this ahead of time?
Yes, store in an airtight container in the fridge for up to 24 hours.
What other fillings can I use?
Try tuna mayo, teriyaki chicken, salmon or crispy calamari.
More Lunchbox Recipes You’ll Love
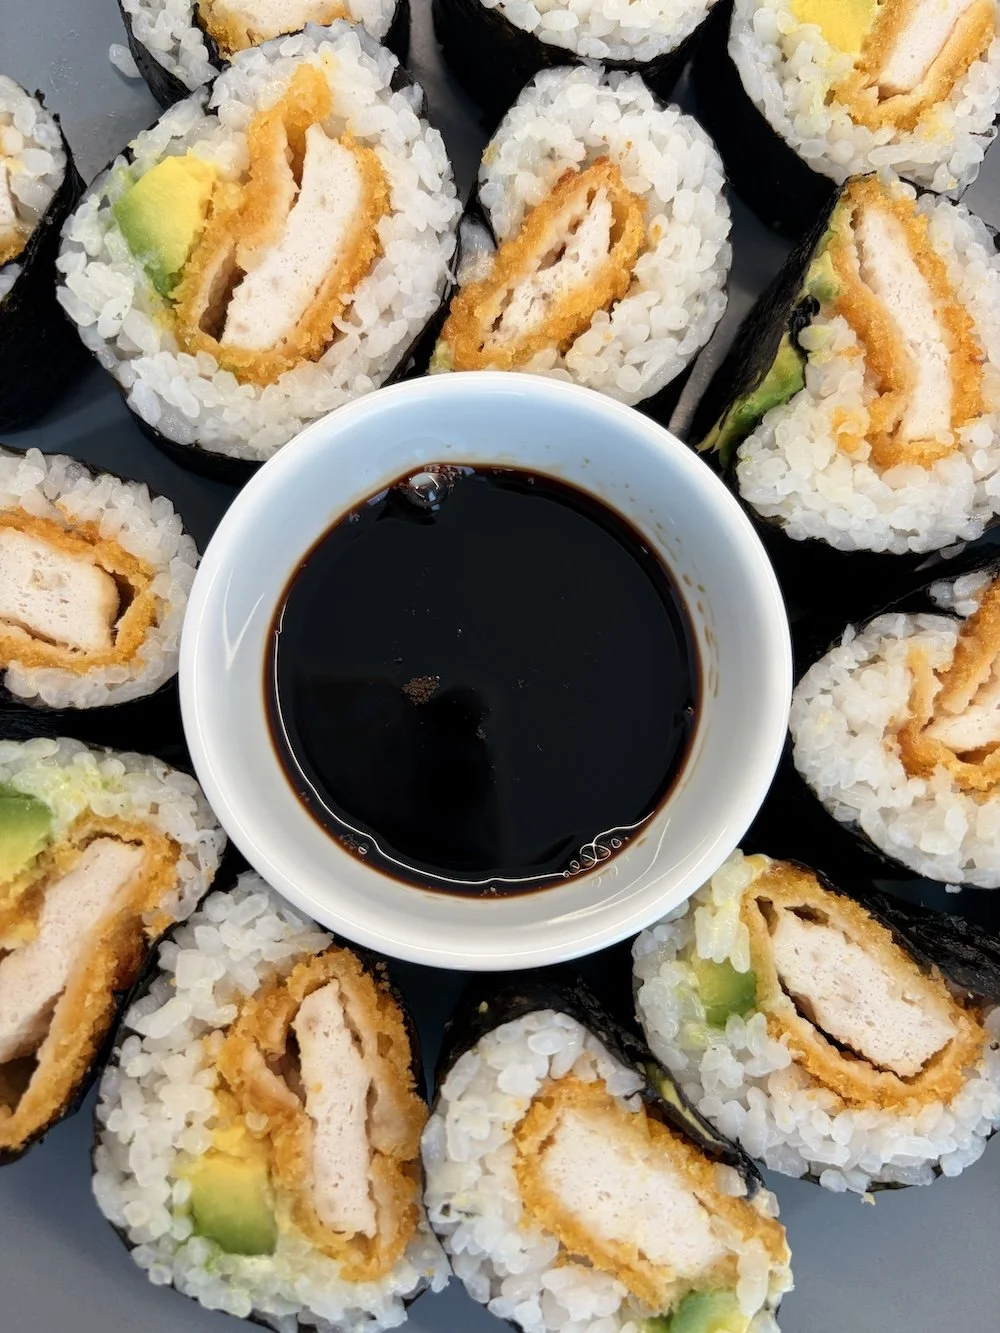


Easy Homemade Sushi
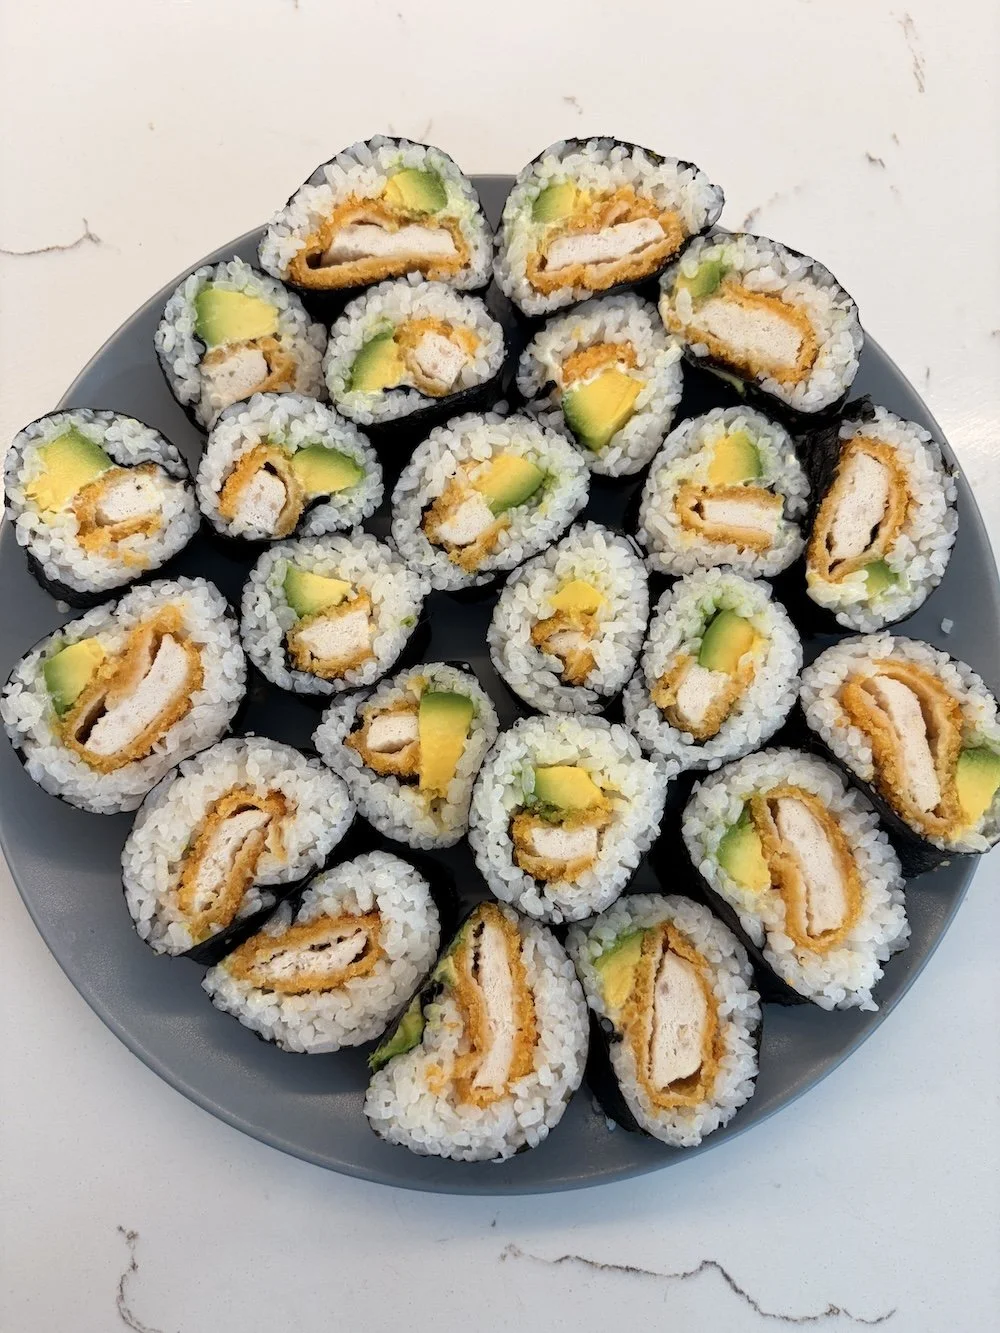
These easy homemade sushi rolls are simple, affordable and perfect for beginners. No sushi mat needed. Just fresh ingredients and a chopping board!
Ingredients
- 1 ½ cups sushi rice
- 1 ½ cups water
- 1 tablespoon rice wine vinegar
- 2 teaspoons caster sugar
- 1 box crumbed chicken tenders
- 4 nori sheets
- Optional FIllings:
- 1 avocado, sliced
- 1 Lebanese cucumber, sliced
- Kewpie mayonnaise
- To Serve:
- Sushi and Sashimi dipping sauce
Instructions
- Rinse sushi rice 3-5 times until the water runs clear. Drain well.
- Cook rice according to packet instructions (rice cooker or stovetop).
- Cook chicken tenders according to packet instructions until golden and crispy. Slice into strips or keep them whole.
- In a small microwave-safe bowl, combine vinegar and sugar. Microwave for 20 seconds and stir until dissolved.
- Transfer cooked rice to a large glass or ceramic dish. Gently fold through the vinegar mixture, breaking up clumps. Allow to cool slightly.
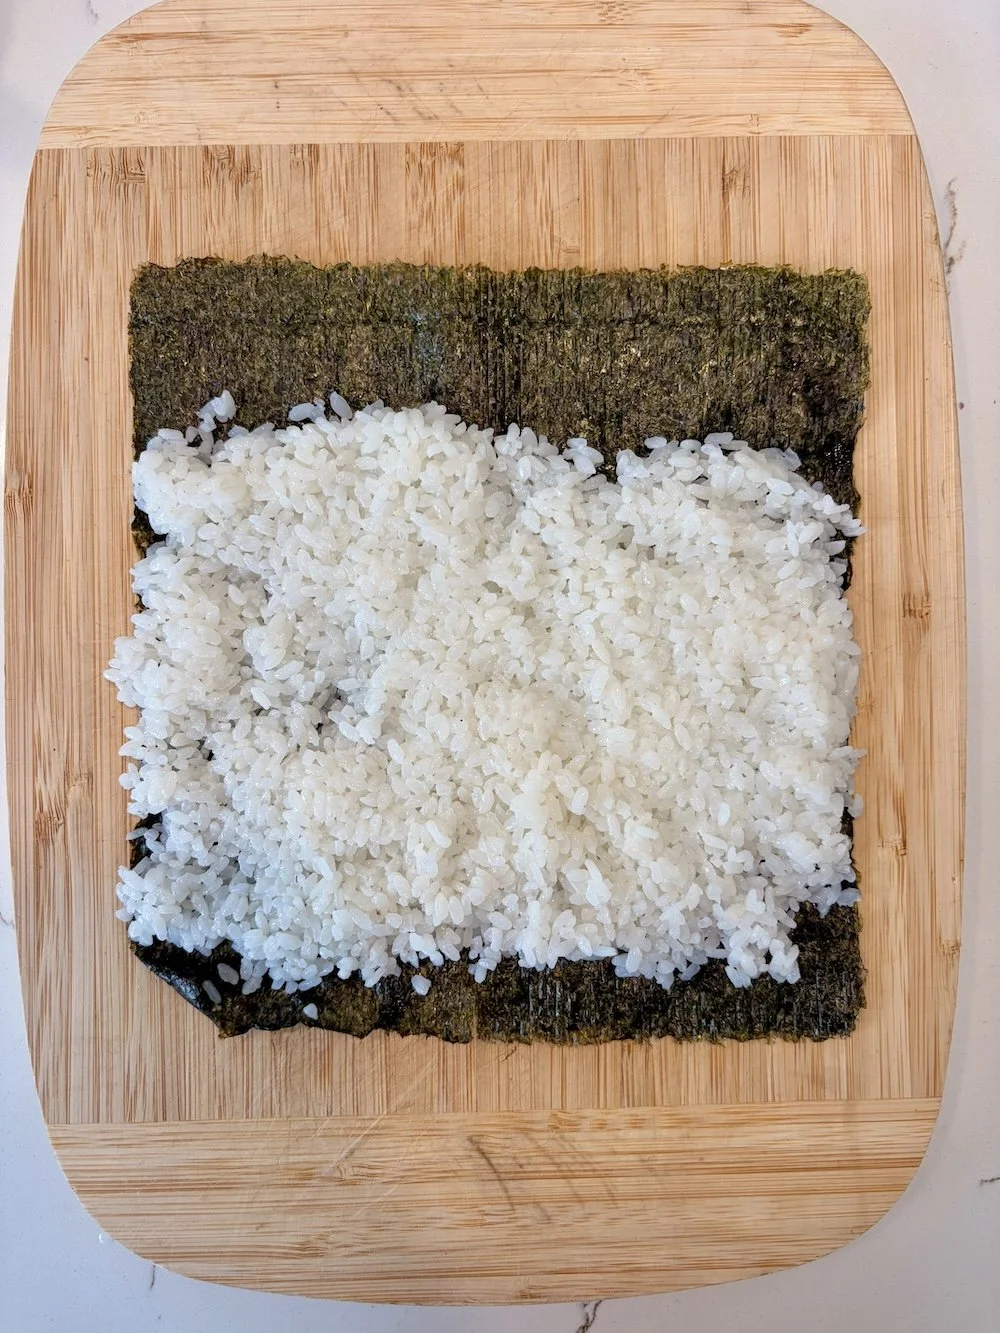
- Place a nori sheet shiny-side down on a chopping board.
- With damp hands, spread a layer of rice evenly over the nori, leaving a 2cm gap at the top and bottom.
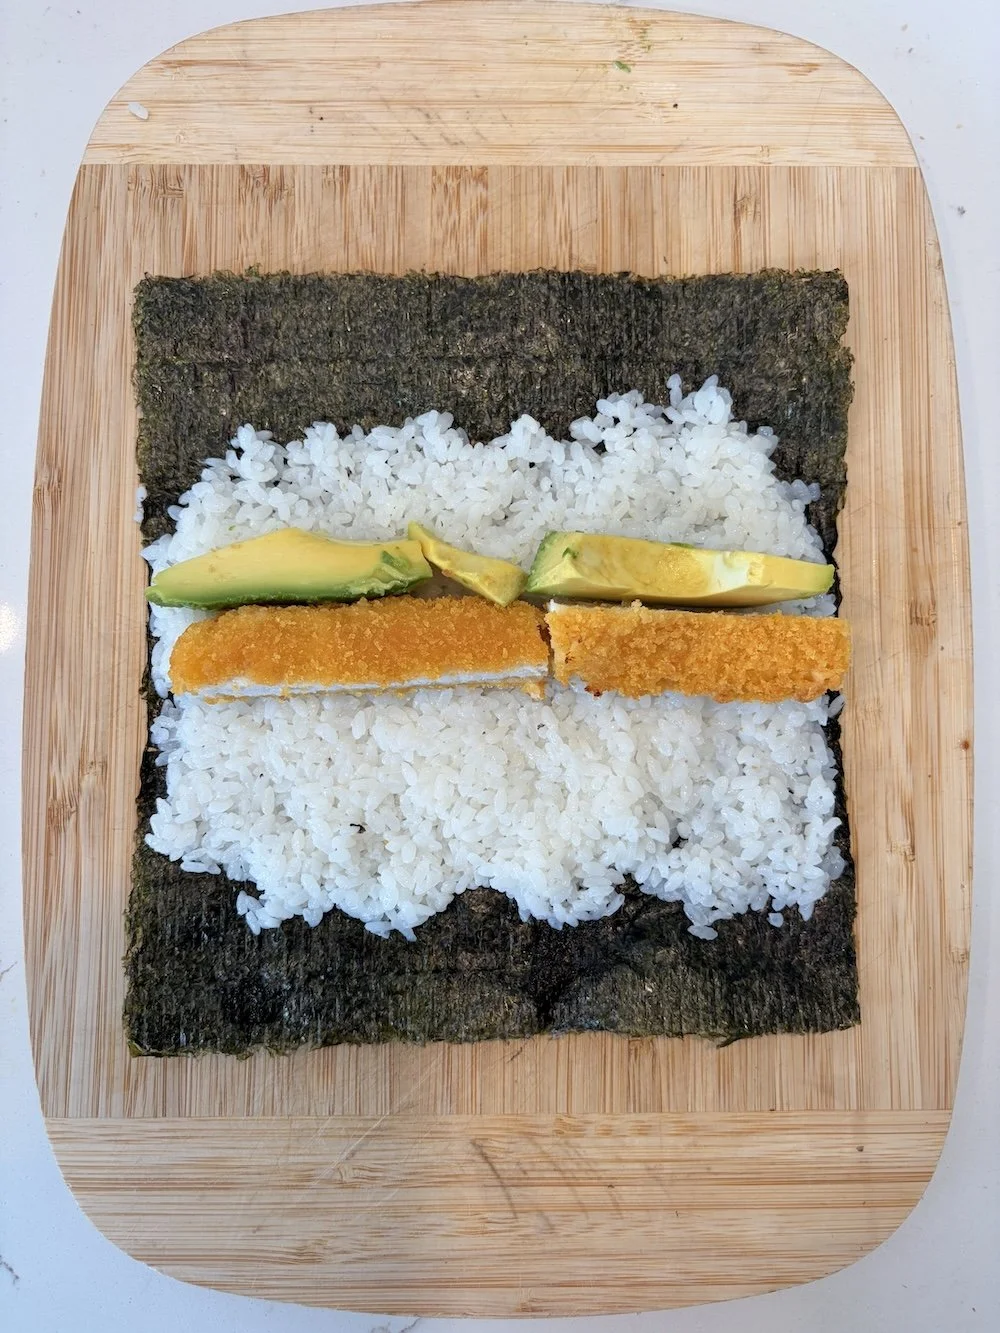
- Add chicken, avocado/cucumber across the lower third of the rice. Drizzle with Kewpie mayo.
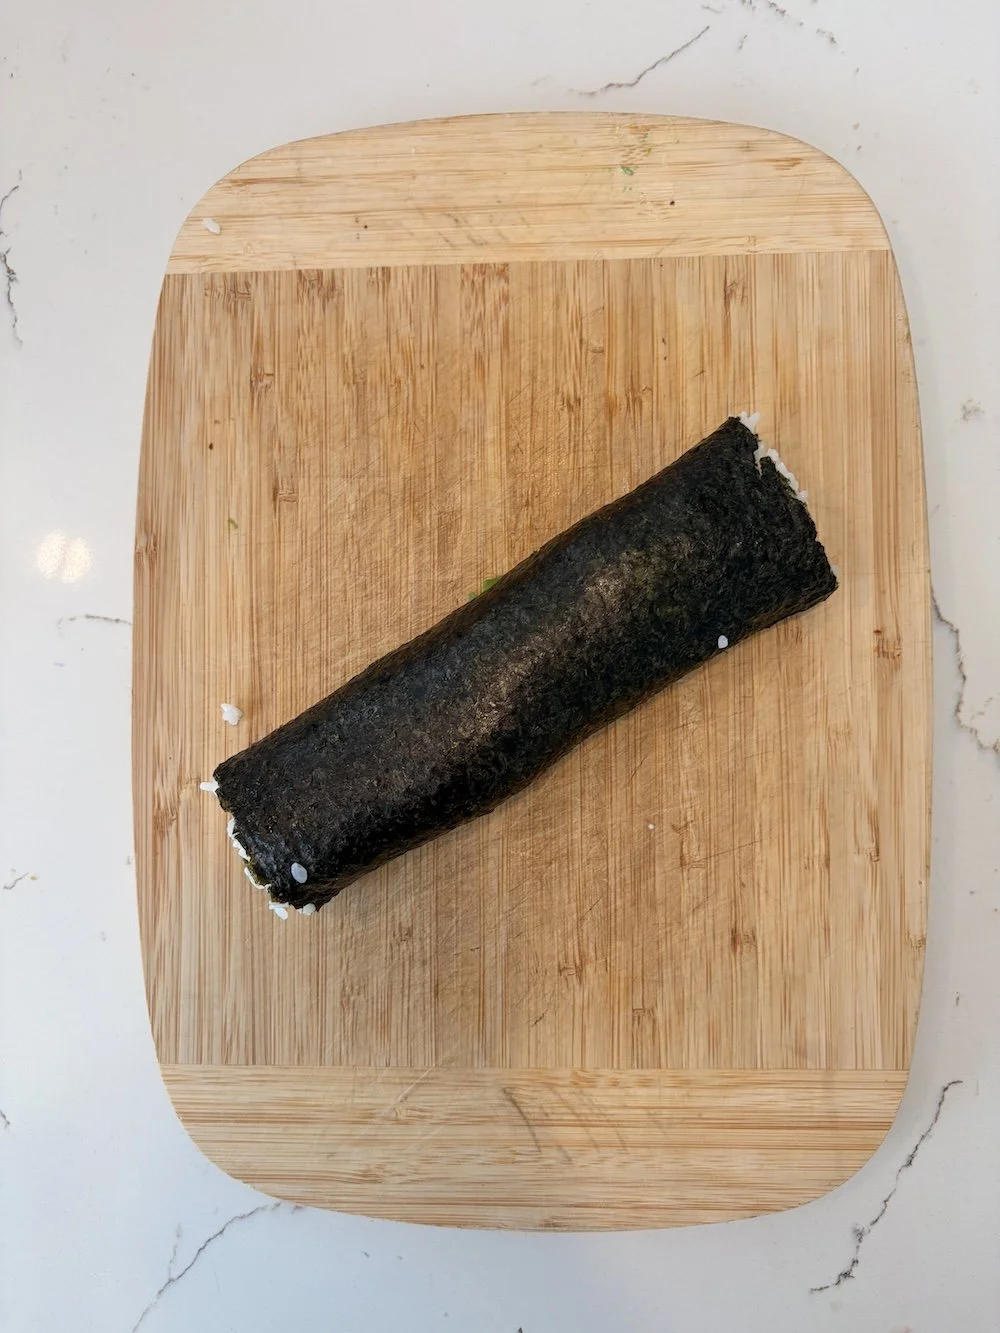
- Lightly dampen the top edge of the nori with water.
- Roll the sushi tightly from the bottom up, sealing at the top.
- Slice into 6 pieces. Repeat with remaining ingredients.
- Serve with soy sauce or sushi dipping sauce.
Notes
Top Tips:
- Use damp hands: This stops the rice from sticking while spreading.
- Don’t overfill: Too many fillings make rolling tricky - keep it simple.
- Cool the rice slightly: Warm (not hot) rice is easier to handle and roll.
- Skip the mat: A chopping board works perfectly - no special tools needed.
- Prep ahead: Make rolls earlier in the day and store covered in the fridge. I find a damp paper towel on top of the sushi works well.
Nutrition Facts
Calories
60Fat
1 gSat. Fat
0 gCarbs
11 gFiber
1 gNet carbs
10 gSugar
0 gProtein
1 gSodium
4 mgCholesterol
0 mgThe nutritional information provided is computer generated and is only an estimate. This data is provided as a courtesy for informational purposes only.


